Knowledge Base - Receiving and Managing Multiple Calls [Yealink]
This article will cover receiving and managing multiple calls on a single handset.
Starting with an idle phone, we wait for the first call:
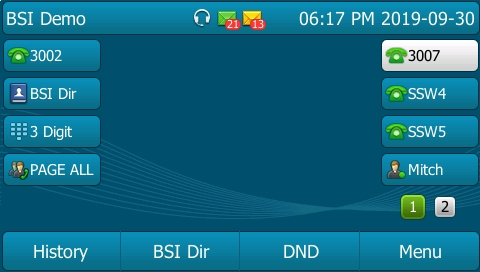
When the phone rings, we see options to deal with the call listed below the screen on soft keys:
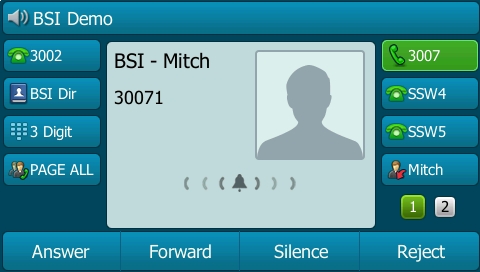
Options include:
- Picking up the handset, tapping the speaker button, or using the Answer button on your headset
- Pressing Answer soft key to answer using the headset if available or speakerphone - last used device preferred
- Pressing Forward soft key to direct this call to another station or number
- Pressing Silence soft key to stop the ringer, but leave the call "ringing" from the perspective of the caller or any queue distribution system
- Pressing Reject soft key to reject the call resulting in a congestion tone or voicemail depending on your configuration
We will press Answer resulting in:
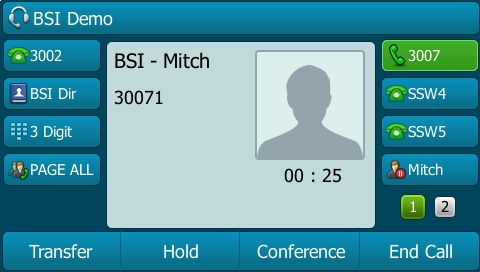
Having answered the first call, we can now decide what we want to do with this call - options include:
- Press Transfer to send the call to another extension or external number
- Press Hold to place the call on hold for later retrieval (if you have calls actively holding you will be prompted with a subtle beep to return to / deal with those calls as soon as possible)
- Press Conference to initiate a 3-way call with another remote party or other active line
- Press End Call to disconnect the current call
Before we are able to take action (for the sake of the simulation), another call appears:
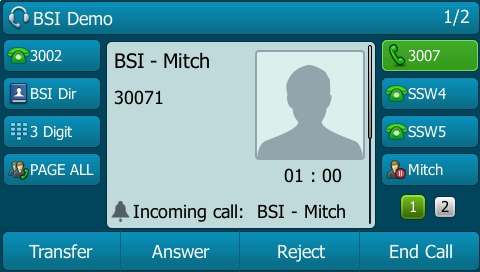
At this point it is important to notice that our focus is on Call #1 of now 2 calls.
We can tell this by noticing the display in the upper right (1 / 2) as well as the scroll bar which looks like it's in the top half of the visible range:
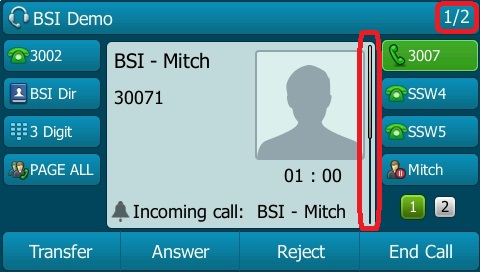
If we used the navigation keys to scroll down to select Call #2, we would have the same options as when Call #1 was ringing (Answer / Forward / Silence / Reject).
As it stands though, we can:
- Transfer our current call while Call #2 continues to ring (this must be done quickly or Call #2 may time out)
- Answer Call #2 (implicitly putting Call #1 on Hold)
- Reject Call #2 (which will send it to Congestion or Voicemail or another queue member)
- End Call to disconnect Call #1 so we can deal with Call #2 immediately after
We will press Answer resulting in:
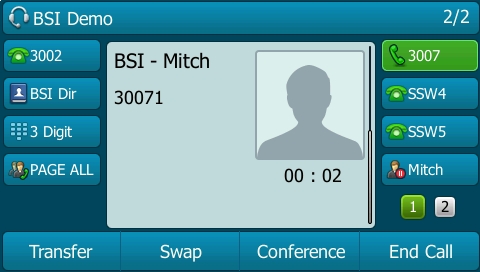
At this point, we are presented a new button Swap, which will allow us to quickly switch bank and forth between two calls.
This button is essentially an automation for pressing hold, changing to the other call, and pressing resume. Of course you can hold the second call as well by using the physical hold button on most phones.
Continuing the process, we now see a third call incoming:
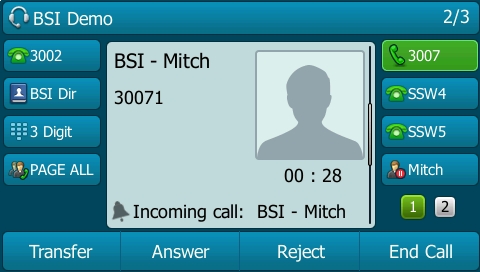
At this point it is important to notice that our focus is on Call #2 of now 3 calls.
We can tell this by noticing the display in the upper right (2 / 3) as well as the scroll bar which looks like it's in the middle of the visible range:
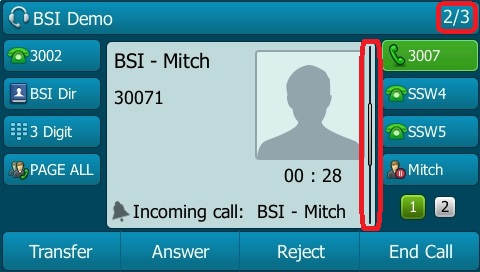
If we used the navigation keys to scroll down to select Call #3, we would have the same options as when Call #1 was ringing (Answer / Forward / Silence / Reject). As it stands though, we can again Transfer (Call #2), Answer (Call #3), Reject (Call #3), or End Call (Call #2) - similar to when Call #2 was ringing.
We will press Answer resulting in:
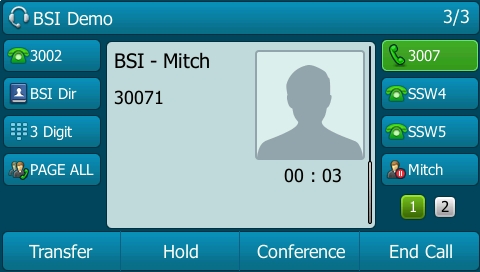
From this point, without putting Call #3 on hold, we can scroll up to select Call #2:
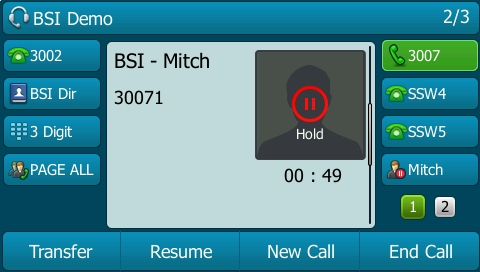
Note the call indicator in the upper right shows 2 / 3.
At this time we could for example Resume or End Call on this party.
Ending the call would not disrupt our conversation with the active caller. This can be a great way to "drop" a conversation with a co-worker to deal with a client (as long as the co-worker expects this of course!).
Pressing the up navigation key again will scroll to Call 1:
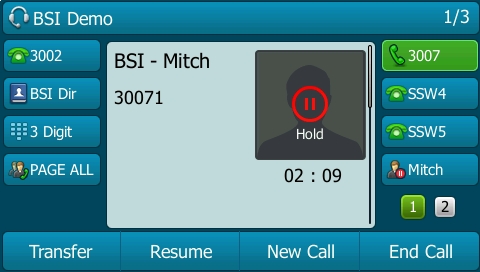
Again, the options are available.
Finally, we can now scroll down twice to return to Call #3.
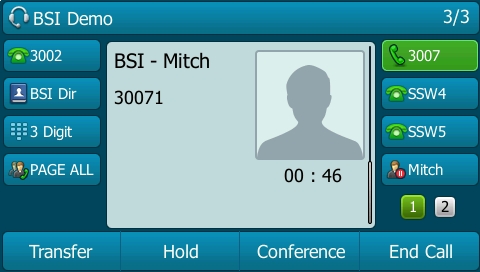
Notice again how the scroll bar moves, and active call indicator updates.
Pressing End Call multiple times as applicable will disconnect all parties.
Applies To
Yealink SIP-T21P-E2, Yealink W52P / W52H, Yealink SIP-T48G, Yealink SIP-T29G, Yealink CP860 (EOL), Yealink CP920, Yealink CP960, Yealink W60P / W56H, Yealink CP930W, Yealink SIP-T43U, Yealink SIP-T46U, EXP43

